Your refrigerator stops cooling. Food starts warming. You’re facing potential spoilage and expensive grocery loss. Before calling a repair technician, you can diagnose and often fix common refrigerator problems yourself in under an hour.
The Association of Home Appliance Manufacturers reports that 68% of refrigerator service calls in 2024 involved issues homeowners could resolve without professional help. This guide walks you through systematic troubleshooting steps that save time, money, and food. Learn how to identify problems, perform safe checks, and know when DIY ends and professional repair begins.
Table of Contents
- Why Your Refrigerator Stops Cooling
- How to Diagnose Fridge Not Cooling Issues
- Step-by-Step Refrigerator Troubleshooting Checks
- When Freezer Works But Fridge Doesn’t Cool
- Brand-Specific Troubleshooting Tips
- FAQ
- Conclusion
Why Your Refrigerator Stops Cooling
Refrigerators stop cooling for reasons ranging from simple power issues to complex compressor failures. Understanding common causes helps you troubleshoot efficiently and avoid unnecessary repair costs.
Refrigerators fail to cool due to dirty condenser coils, blocked air vents, incorrect temperature settings, faulty door seals, defrost system problems, or compressor malfunctions. Most cooling issues stem from maintenance neglect rather than component failure.
The Refrigeration Cycle Basics
Your refrigerator uses a closed-loop system where refrigerant absorbs heat inside the cabinet and releases it outside through condenser coils. The compressor pumps refrigerant through this cycle continuously. When any component in this system fails or gets obstructed, cooling stops.
Understanding this cycle helps you identify where problems occur. If condenser coils are covered in dust, heat can’t escape efficiently. If the evaporator coils ice over, cold air can’t circulate. Each symptom points to specific failure points in the refrigeration cycle.
Most Common Cooling Failure Causes
Dirty condenser coils cause approximately 35% of refrigerator cooling complaints, according to appliance repair data from 2024. Dust and pet hair accumulate on these coils, acting as insulation that prevents heat dissipation. This forces your compressor to work harder while achieving less cooling.
Door seal failures rank second among common causes. Worn or torn gaskets allow warm air infiltration, making your refrigerator run constantly while struggling to maintain temperature. A simple dollar bill test reveals seal problems: close the door on a bill and try pulling it out. If it slides easily, your seal needs replacement.
Common Cooling Failure Checklist:
- Dirty condenser coils (35% of cases)
- Faulty door gaskets allowing air leaks
- Incorrect thermostat settings or sensor failure
- Blocked air vents preventing circulation
- Evaporator fan motor failure
- Defrost system malfunction causing ice buildup
- Compressor or start relay problems
- Power supply interruptions
Temperature Warning Signs
Refrigerators should maintain 35-38°F in the fresh food compartment and 0°F in the freezer. Temperatures above 40°F risk bacterial growth and food spoilage. The USDA recommends discarding perishables left above 40°F for more than two hours.
Install an appliance thermometer to monitor actual temperatures rather than relying on control dial numbers. Many refrigerators lack accurate temperature displays. A $5 thermometer provides precise readings that help you catch problems before food spoils.
How to Diagnose Fridge Not Cooling Issues
Effective diagnosis follows a systematic approach from simplest to most complex causes. This methodology saves time and prevents unnecessary part replacements.
Diagnose refrigerator cooling problems by checking power supply first, then inspecting temperature settings, door seals, condenser coils, and airflow. Listen for compressor operation and fan motors. Use a thermometer to measure actual compartment temperatures.
The 5-Minute Power and Settings Check
Start with basics before investigating mechanical issues. Verify the refrigerator is plugged in and the outlet works by testing with another device. Check your home’s circuit breaker panel for tripped breakers. Power interruptions cause 12% of service calls, according to appliance repair statistics.
Examine temperature control settings next. Someone may have accidentally adjusted the thermostat. Most refrigerators have separate controls for the freezer and fresh food sections. Ensure neither is set to the warmest position or turned off completely.
Visual Inspection Protocol
Look inside both compartments for blocked air vents. Overloading shelves or pushing items against back walls blocks airflow from the freezer to the refrigerator. Cold air must circulate freely for proper cooling. Remove any items blocking vents and wait 24 hours to see if temperatures normalize.
Check door seals for cracks, tears, or deformation. Run your hand around the closed door perimeter feeling for cold air escaping. Inspect the magnetic seal for debris or food particles preventing proper closure. Clean gaskets with warm soapy water and ensure they lie flat against the cabinet.
Expert Tip: Place a flashlight inside the refrigerator and close the door in a darkened room. Light leaking around the door edges indicates seal failure requiring gasket replacement.
Listen for Operating Sounds
A working refrigerator makes specific sounds. You should hear the compressor humming or buzzing when running. Evaporator and condenser fans produce gentle whooshing sounds. Complete silence often indicates power or control board failure.
Loud clicking, buzzing, or grinding noises signal mechanical problems. A clicking sound every few minutes suggests the compressor tries to start but fails, indicating a bad start relay or capacitor. These components cost less than professional diagnosis, making them reasonable DIY replacement candidates.
Step-by-Step Refrigerator Troubleshooting Checks
Follow these checks in order, starting with the easiest fixes. This approach minimizes time investment while addressing the most common problems first.
Perform refrigerator troubleshooting by cleaning condenser coils, verifying airflow, testing door seals, checking the defrost system, inspecting fans, and testing the compressor. Complete each step before moving to the next for efficient diagnosis.
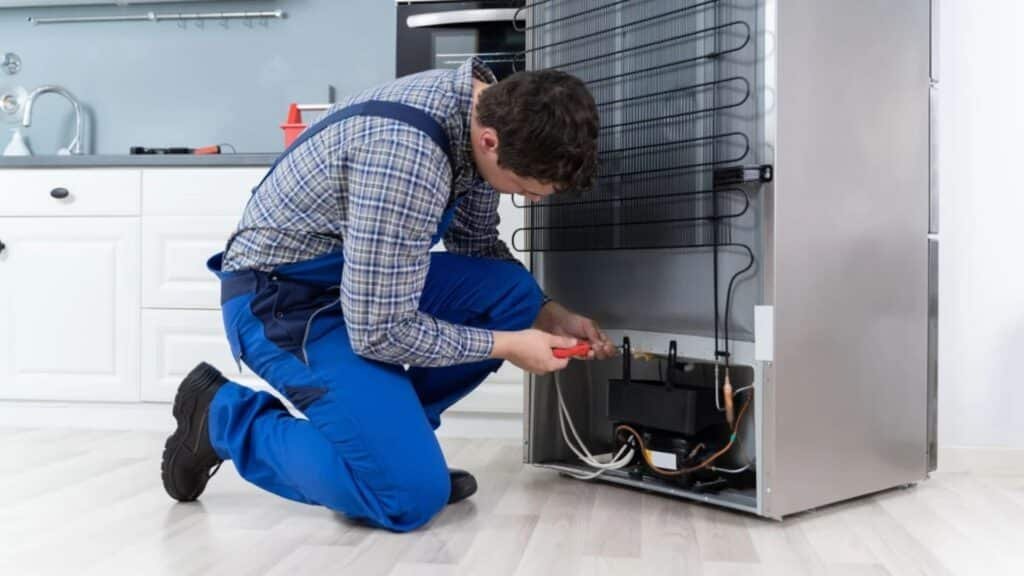
Step 1: Clean the Condenser Coils
Dirty condenser coils reduce cooling efficiency by up to 25%, forcing longer run times and higher energy bills. Coils located on the back panel or beneath the refrigerator collect dust, pet hair, and debris over time.
Unplug the refrigerator before cleaning. Use a vacuum with a brush attachment or a specialized coil cleaning brush to remove buildup. Work gently to avoid bending fins. Clean coils every six months in normal conditions, or quarterly if you have pets.
After cleaning, plug in the refrigerator and wait 24 hours before assessing improvement. Cooling may not normalize immediately as the system needs time to cycle refrigerant properly and stabilize temperatures.
Step 2: Verify Interior Airflow
Remove items blocking vents inside both compartments. Most refrigerators use a single evaporator in the freezer section, circulating cold air to the fresh food compartment through vents. Blocking these vents prevents proper cooling distribution.
Check for ice buildup on evaporator coils visible behind the back panel inside the freezer. Excessive frost indicates a defrost system problem. The automatic defrost cycle should prevent ice accumulation. If you see more than a thin frost layer, the defrost heater, thermostat, or timer may have failed.
Step 3: Test Temperature Controls and Sensors
Adjust the thermostat to a colder setting and listen for the compressor to start within 5-10 minutes. If nothing happens, the thermostat or control board may be faulty. If the compressor runs continuously without reaching proper temperature, the system has a refrigerant leak or compressor failure.
Some refrigerators use electronic sensors instead of mechanical thermostats. These sensors can fail or provide incorrect readings to the control board. Testing sensors requires a multimeter and technical knowledge. Consider professional diagnosis if you suspect sensor problems.
Mini-Case: A homeowner in Miami noticed their Sub-Zero refrigerator running constantly but not cooling properly. After checking power and settings with no improvement, they discovered the evaporator fan had stopped working. Replacing the fan motor for under $100 restored normal operation, avoiding a $400 service call.
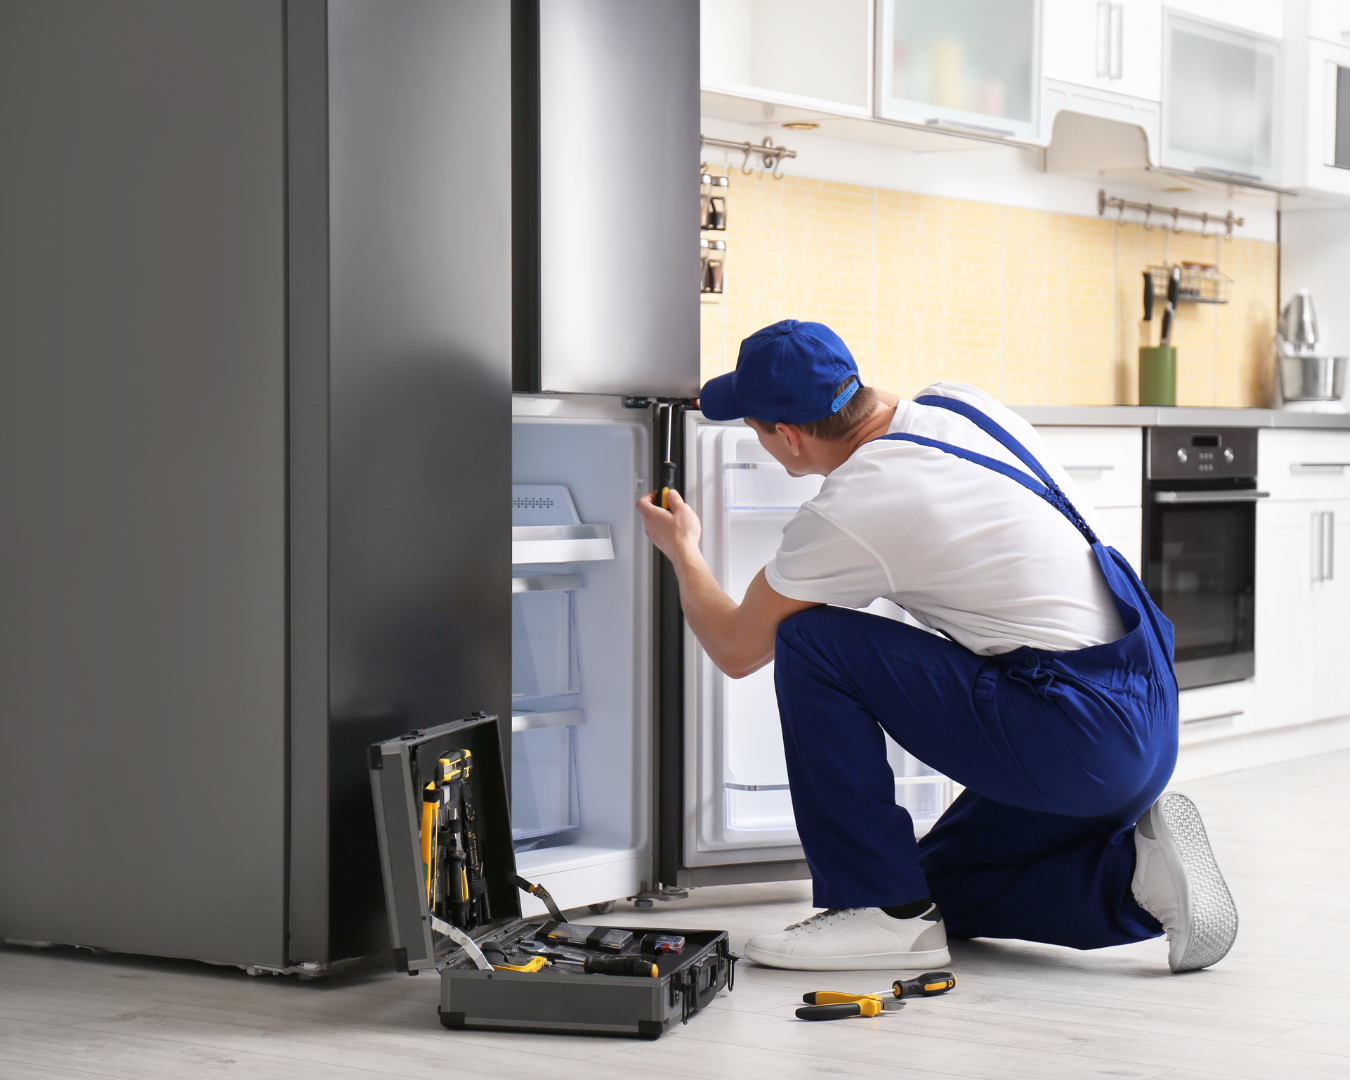
Step 4: Inspect Fan Motors
Open the refrigerator door and locate the evaporator fan inside the freezer compartment, usually behind a panel. Listen for the fan running. If silent, the motor may have failed or become jammed with ice.
The condenser fan, located near the compressor at the back or bottom of the unit, must also operate when the compressor runs. A failed condenser fan causes overheating and cooling failure. Both fan motors are relatively inexpensive parts suitable for DIY replacement if you’re comfortable with basic appliance repair.
Step 5: Check the Compressor and Start Components
The compressor should feel warm to the touch when running and cycle on and off periodically. If it’s hot enough to cause discomfort, it’s overheating due to condenser coil blockage or failure. If it is completely cold and silent, it’s not receiving power or the start relay has failed.
Test the start relay by removing it and shaking it. If you hear rattling, the relay is bad and needs replacement. This part costs around $20-$40 and fixes many refrigerators that won’t start. Replacing a compressor costs $400-$800 including labor, making it often more economical to replace the entire refrigerator.
Refrigerator Troubleshooting Guide: Fix Common Cooling Problems Fast
When Freezer Works But Fridge Doesn’t Cool
This specific problem indicates airflow issues between compartments rather than overall refrigeration failure. The solution usually involves simpler repairs than complete cooling loss.
When the freezer works but the refrigerator doesn’t cool, check for blocked air dampers, failed evaporator fans, or defrost system problems causing ice buildup that blocks airflow. The refrigeration system works, but cold air isn’t reaching the fresh food section.
Damper Control Problems
Most refrigerators regulate fresh food compartment temperature using a damper that controls airflow from the freezer. This damper opens and closes based on thermostat readings. A stuck damper prevents cold air from entering the refrigerator section.
Locate the damper control, usually on the back wall of the refrigerator compartment or between the two sections. Listen for the damper motor when adjusting temperature settings. If you hear no sound and feel no airflow, the damper or its motor has failed.
Evaporator Fan Failure Impact
The evaporator fan circulates air across the cooling coils and through both compartments. When this fan fails, the freezer may stay cold due to proximity to the evaporator, while the refrigerator warms because air isn’t circulating.
Access the evaporator fan by removing the back panel inside the freezer. The fan should spin freely by hand when unplugged. If it’s stuck or difficult to turn, the motor bearings have failed. Fan motors cost $50-$150 depending on your refrigerator model.
Expert Tip: Before replacing an evaporator fan motor, verify the fan blade isn’t simply jammed with ice. Defrost the freezer completely and see if the fan operates normally. Ice buildup from a faulty defrost system often mimics fan motor failure.
Air Duct Blockages
Food packages, ice cream containers, or frozen items can block air ducts that route cold air from the freezer to the refrigerator. These blockages prevent airflow even when all components function properly.
Remove all items from the freezer and locate air circulation paths. Check for obstructions in ducts, vents, and air channels. Reorganize freezer contents to maintain clear airflow. Wait 6-8 hours after clearing blockages to allow temperatures to stabilize.
Brand-Specific Troubleshooting Tips
Different manufacturers use varying designs requiring specialized troubleshooting approaches. Understanding brand-specific quirks helps you diagnose problems faster.
Whirlpool refrigerators often have adaptive defrost issues, Sub-Zero models experience control board sensitivity, Norcold RV refrigerators require level installation and proper ventilation. Each brand has common failure points that inform troubleshooting priorities.
Whirlpool Refrigerator Troubleshooting
Whirlpool refrigerators commonly experience adaptive defrost control board failures. The adaptive defrost system monitors compressor runtime and adjusts defrost cycles accordingly. When this system fails, the evaporator coils ice over, blocking airflow.
Reset the control board by unplugging the refrigerator for 5 minutes, then restoring power. If ice buildup occurs, manually defrost by unplugging for 24 hours with doors open. This temporary fix confirms defrost system problems requiring control board or defrost timer replacement.
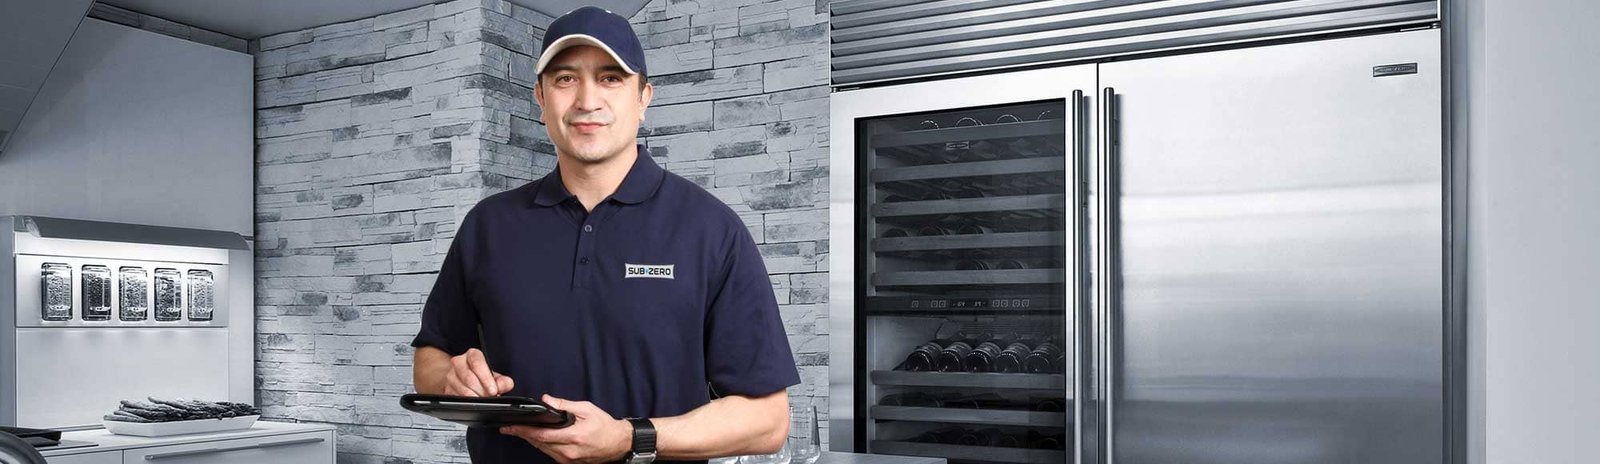
Sub-Zero Refrigerator Considerations
Sub-Zero refrigerators use sophisticated electronic controls that require specific diagnostic procedures. The control panel displays error codes when problems occur. Consult your model’s manual to interpret codes, which directly identify failed components.
Sub-Zero models are built for longevity, often operating 20+ years with proper maintenance. However, their complexity means DIY repairs are limited. Control boards, sealed systems, and specialized components typically require factory-certified technicians. SubZero Repair Co. reports that attempting unauthorized repairs can void warranties and cause additional damage.
Norcold RV Refrigerator Troubleshooting
RV refrigerators operate on different principles than residential models, using absorption cooling rather than compressor-based systems. Norcold models can run on propane, 12V DC, or 120V AC power depending on configuration.
These refrigerators require level installation within 3 degrees for proper operation. If your RV is parked on an incline, the refrigerator won’t cool effectively. Check level before troubleshooting other issues. Verify propane supply and burner ignition if operating on gas mode. Clean the burner assembly annually for reliable operation.
Troubleshooting Priority by Brand:
- Whirlpool: Check adaptive defrost system first
- Sub-Zero: Review error codes on control panel
- Samsung: Inspect ice maker and water dispenser connections
- LG: Test linear compressor operation
- Norcold RV: Verify level installation and power source
- GE: Examine defrost thermostat and heater assembly
FAQ
How long should I wait after plugging in a refrigerator before it cools?
A refrigerator typically takes 4-6 hours to reach proper cooling temperature after being plugged in or reset. Allow 24 hours for full temperature stabilization before adding perishable food. Freezers may take longer, requiring up to 12-24 hours to reach 0°F. Avoid opening doors frequently during the initial cooling period.
Can I fix a refrigerator that’s not cooling without calling a technician?
Yes, you can fix many cooling issues yourself if they involve dirty condenser coils, incorrect settings, blocked vents, or faulty door seals. These repairs require no special tools or technical knowledge. However, compressor problems, refrigerant leaks, or sealed system failures require professional repair. Know your limits and prioritize safety.
Why is my refrigerator running but not getting cold?
A refrigerator that runs continuously without cooling likely has dirty condenser coils, a failed evaporator fan, low refrigerant due to leaks, or compressor problems. Start by cleaning coils and checking fan operation. If these components work properly, the sealed refrigeration system needs professional diagnosis and repair.
How do I know if my refrigerator compressor is bad?
A bad compressor may click repeatedly without starting, run extremely hot, make loud grinding noises, or fail to start at all. Test by listening for operation and feeling for warmth. If the compressor is cool and silent when the refrigerator should be running, check the start relay first before concluding compressor failure.
Conclusion
Refrigerator troubleshooting follows a logical sequence from simple fixes to complex repairs. Start with power, settings, and cleanliness before investigating mechanical components. Most cooling problems result from maintenance neglect rather than part failure, making regular coil cleaning and seal inspection essential preventive measures.
You can successfully diagnose and repair many refrigerator issues using basic tools and systematic checks. However, sealed system repairs involving refrigerants require EPA-certified technicians and specialized equipment. Know when DIY ends and professional service begins to avoid safety risks and additional damage.
Keep your refrigerator running efficiently by cleaning condenser coils every six months, checking door seals quarterly, and maintaining proper temperature settings. These simple maintenance tasks prevent most cooling failures and extend appliance life by years.
Need professional refrigerator diagnosis or repair? Schedule your appliance diagnostic today with SubZero Repair Co. at (800) 651-4528. Our factory-certified technicians provide same-day service across South Florida with genuine parts and comprehensive warranties on all repairs.