Posts made in November 2025

Refrigerator Compressor Repair: Complete Diagnostic and Repair

Refrigerator compressor failures account for nearly 30% of all major appliance breakdowns, according to the Appliance Repair Institute’s 2024 service data. The compressor serves as your refrigerator’s heart, circulating refrigerant through the sealed system to maintain proper cooling temperatures. When this critical component fails, your food safety and household budget both face immediate risks.

Most homeowners first notice compressor problems when their refrigerator stops cooling properly or begins making unusual clicking and buzzing sounds. Understanding how to diagnose these issues helps you determine whether simple repairs can restore function or if professional sealed system work becomes necessary. This guide provides expert-backed information to help you make informed decisions about refrigerator compressor repair.

Table of Contents

  1. What Is a Refrigerator Compressor
  2. Signs Your Refrigerator Compressor Is Failing
  3. How to Diagnose Refrigerator Compressor Problems
  4. How to Repair a Refrigerator Compressor
  5. When to Replace vs Repair the Compressor
  6. Refrigerator Compressor Costs in 2025
  7. FAQ
  8. Conclusion

What Is a Refrigerator Compressor

The refrigerator compressor is a motor-driven pump that pressurizes and circulates refrigerant through your appliance’s sealed cooling system. This hermetically sealed unit sits at the bottom rear of most refrigerators, encased in a black metal housing. The compressor transforms low-pressure refrigerant gas into high-pressure gas, enabling the heat exchange process that keeps food cold.

A refrigerator compressor pumps refrigerant through the sealed system, creating the pressure differentials needed for cooling. Modern units use R134a or R600a refrigerant and typically run intermittently based on temperature sensor feedback.

Understanding Compressor Operation

The compressor activates when internal temperature sensors detect warmth exceeding set thresholds. It compresses refrigerant gas, raising both pressure and temperature before sending it to the condenser coils. This pressurized refrigerant releases heat as it flows through external coils, then returns to low pressure as it enters the evaporator.

Major manufacturers like Whirlpool, LG, Samsung, and GE Appliances engineer compressors to cycle on and off throughout the day. According to Energy Star testing protocols updated in 2023, efficient compressors should run approximately 80-90% of the time in ambient temperatures around 90°F. Excessive cycling or continuous operation signals potential problems requiring diagnosis.

Compressor Components and Types

Modern refrigerators use three main compressor types: reciprocating, rotary, and inverter-driven models. Inverter compressors adjust speed based on cooling demand rather than cycling completely on and off. This technology, widely adopted by LG and Samsung since 2020, reduces energy consumption by up to 30% compared to traditional single-speed units.

The start relay and overload protector attach directly to the compressor housing, controlling electrical current flow during startup. These components frequently fail before the compressor itself, making them critical diagnostic checkpoints. The U.S. Department of Energy reports that relay failures cause approximately 40% of compressor-related service calls.

Signs Your Refrigerator Compressor Is Failing

Recognizing compressor failure symptoms early prevents complete breakdowns and food spoilage. Your refrigerator communicates problems through specific sounds, temperature changes, and operational patterns. Learning these warning signs helps you act quickly before minor issues escalate into expensive sealed system repairs.

Failing compressors produce clicking or buzzing sounds, cause inadequate cooling, run continuously without cycling off, feel excessively hot to touch, or stop running entirely despite power supply.

Common Audible Symptoms

Repetitive clicking sounds every few minutes indicate start relay failure or compressor startup struggles. The clicking occurs as the relay attempts to engage the compressor motor but fails to sustain operation. This pattern often worsens over days or weeks before the compressor stops attempting to start completely.

Loud buzzing or humming that differs from normal operating sounds suggests internal compressor damage or electrical problems. Consumer Reports documented in their 2024 reliability survey that buzzing complaints increased 15% year over year, particularly in refrigerators aged 7-10 years. The sound may accompany warm internal temperatures as cooling capacity diminishes.

Expert Tip: Place your hand near the compressor housing during operation. Excessive heat that makes the unit uncomfortable to touch for more than 2-3 seconds indicates overheating problems requiring immediate professional attention.

Temperature and Performance Changes

Your refrigerator compartment warming above 40°F while the freezer maintains some cooling suggests the compressor struggles to generate sufficient pressure. This pattern indicates the sealed system produces partial cooling but cannot maintain design specifications. The FDA recommends keeping refrigerator temperatures at or below 40°F for food safety.

Continuous compressor operation without normal cycling off periods signals the unit working excessively hard to maintain temperature. Check if condenser coils appear clean and fans operate properly before concluding compressor failure. According to GE Appliances technical bulletins from 2023, dirty condenser coils cause 60% of continuous-run complaints that homeowners attribute to compressor problems.

Checklist: Compressor Failure Warning Signs

  • Clicking sounds repeating every 2-5 minutes
  • Loud buzzing or humming during operation
  • Refrigerator temperature above 40°F
  • Freezer temperature above 0°F but still partially cold
  • Compressor housing excessively hot to touch
  • Complete silence with no compressor operation
  • Continuous running without normal cycling
  • Tripped circuit breaker when compressor attempts to start

How to Diagnose Refrigerator Compressor Problems

Proper diagnosis separates actual compressor failures from related component problems that cost significantly less to repair. Systematic testing identifies whether the compressor itself failed or if supporting components like the start relay, overload protector, or temperature control caused operational issues. This methodical approach prevents unnecessary compressor replacement expenses.

Diagnose compressor problems by testing electrical continuity with a multimeter, checking start relay and overload protector function, inspecting condenser coils for blockage, and monitoring compressor temperature during operation.

Safety Steps Before Diagnosis

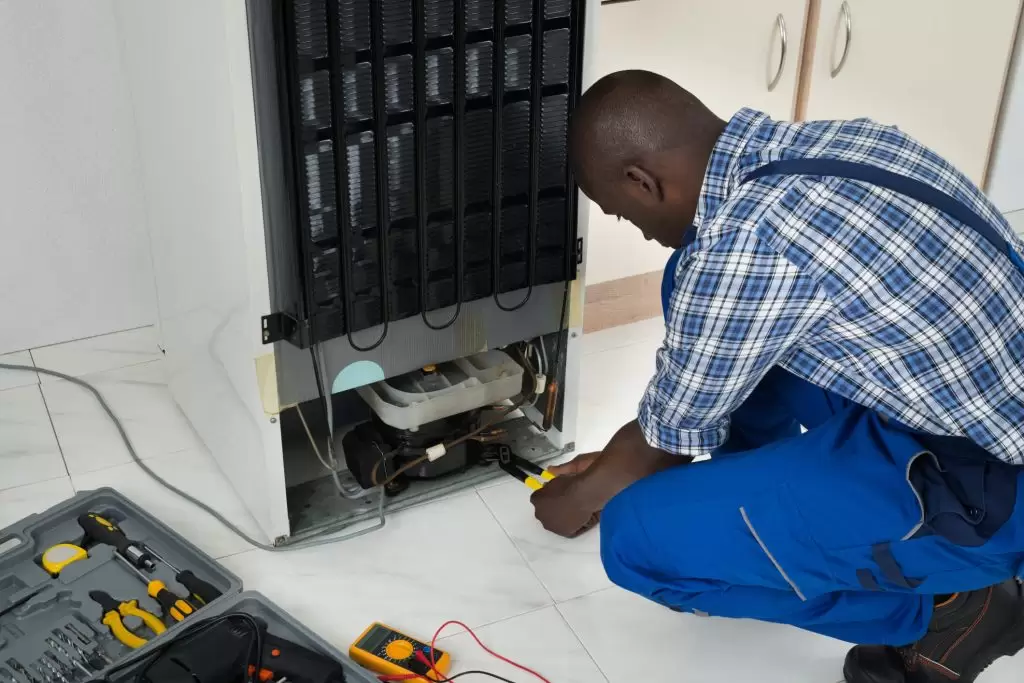
Disconnect electrical power at the circuit breaker before performing any diagnostic tests on refrigerator electrical components. Capacitors and electrical connections retain dangerous voltage even after unplugging the appliance. Wait at least 5 minutes after power disconnection before touching any wiring or components.

Locate the compressor at the lower rear of your refrigerator and clear adequate workspace around the unit. Remove the access panel covering the compressor and relay assembly. Take photos of wire connections before removing any components to ensure correct reassembly.

Multimeter Testing Procedures

Set your multimeter to measure ohms of resistance for continuity testing. Disconnect the start relay from the compressor terminals and test resistance between the three terminal pins. Typical readings show 3-6 ohms between start and run terminals, 2-4 ohms between common and run, and combined resistance between start and common.

Infinite resistance or zero ohms on any reading indicates internal compressor winding failure requiring replacement. According to testing standards published by the Appliance Repair Institute in 2024, these resistance ranges apply to most residential compressors rated between 1/5 and 1/3 horsepower.

Mini-Case: A homeowner in Phoenix tested their Whirlpool refrigerator compressor after experiencing clicking sounds. Multimeter readings showed infinite resistance between common and start terminals, confirming open windings. Professional sealed system diagnosis revealed the 9-year-old compressor failed due to normal wear, avoiding unnecessary relay replacements.

Relay and Overload Component Checks

Remove the start relay by pulling it straight off the compressor terminals. Shake the relay gently and listen for a rattling sound from the internal mechanism. A working relay should rattle, while a failed unit remains silent due to stuck or damaged internal contacts.

Test the overload protector by checking continuity with your multimeter. A functional overload shows zero resistance when cool but opens the circuit when heated beyond safe operating temperature. Replace both relay and overload components together, as they cost $15-$30 for the pair and often fail in tandem.

Condenser Coil Inspection

Examine condenser coils located on the refrigerator’s back or bottom for dust, pet hair, and debris accumulation. Blocked coils force the compressor to work harder and run hotter, eventually causing premature failure. Energy Star guidelines recommend cleaning condenser coils every 6 months in typical households.

Use a coil brush and vacuum to remove buildup gently without damaging delicate fins. Straighten any bent fins with a fin comb to restore proper airflow. Samsung technical documentation from 2023 indicates that maintaining clean coils extends the average compressor lifespan by 2-3 years.

How to Repair a Refrigerator Compressor

Refrigerator compressor repair typically involves replacing failed support components rather than rebuilding the sealed compressor unit itself. The hermetically sealed design prevents internal repairs, but addressing relay, overload, and electrical issues often restores function. Understanding repair scope helps you determine if DIY fixes work or if professional sealed system service becomes necessary.

Repairing compressor systems involves replacing the start relay and overload protector, cleaning condenser coils, checking electrical connections, and testing capacitor function. Actual compressor replacement requires EPA-certified technicians for refrigerant handling.

Start Relay Replacement Process

Purchase the correct replacement relay by matching your refrigerator’s model number with manufacturer parts specifications. Whirlpool, GE Appliances, and LG maintain online parts diagrams showing exact relay part numbers. Generic universal relays work for many applications but may not provide optimal performance.

Remove the old relay by pulling firmly straight off the compressor terminals. Clean terminal pins with fine sandpaper if corrosion appears. Install the new relay by aligning it with terminal configuration and pressing firmly until fully seated. Reconnect ground wire if your model includes this safety feature.

Reinstall the overload protector by clipping it onto the relay body or compressor housing per manufacturer design. Restore power and monitor for proper startup. The compressor should engage within 1-2 minutes and run quietly without clicking sounds.

Expert Tip: Mark relay orientation with a permanent marker before removal. Installing relays upside down or reversed causes immediate failure and potential compressor damage from incorrect current flow during startup attempts.

Electrical Connection Verification

Inspect all wire connections to the compressor, relay, and overload for signs of burning, corrosion, or looseness. Tighten any loose terminal screws and replace damaged wire connectors with appropriately rated electrical terminals. Poor connections cause voltage drops that prevent proper compressor operation.

Test voltage at the compressor terminals using your multimeter set to AC voltage. You should measure approximately 115-120 volts at the common and run terminals when the thermostat calls for cooling. Significantly lower voltage indicates household electrical problems requiring electrician service.

When Professional Sealed System Work Becomes Necessary

Compressor replacement requires EPA Section 608 certification for refrigerant recovery and recharging. The sealed system contains R134a or R600a refrigerant under pressure, making DIY replacement illegal and dangerous. Professional technicians use specialized equipment to recover refrigerant, replace the compressor, evacuate the system, and recharge with precise refrigerant quantities.

Sub-Zero Repair Services provides certified sealed system repair throughout their service areas, handling complex compressor replacements that exceed homeowner capabilities. Their technicians use nitrogen pressure testing, vacuum pumps, and refrigerant scales to ensure proper sealed system integrity after compressor installation.

When to Replace vs Repair the Compressor

Deciding between compressor repair and whole refrigerator replacement depends on appliance age, repair costs, and long-term value analysis. The economics shifted significantly in 2024 as new refrigerator prices increased while compressor replacement costs remained relatively stable. Evaluating multiple factors helps you make financially sound decisions.

Replace compressors in refrigerators under 8 years old when repair costs less than 50% of replacement value. Consider whole appliance replacement for units over 12 years old or when multiple major components show wear.

Age and Value Analysis Framework

Refrigerators typically last 10-15 years with proper maintenance according to Consumer Reports longevity data updated in 2024. Apply the 50% rule: if repair costs exceed half the price of a comparable new model, replacement makes better financial sense. For a refrigerator worth $1,200 new, repairs exceeding $600 favor replacement.

Consider remaining useful life after repair. A compressor replacement on a 5-year-old LG refrigerator potentially provides another 8-10 years of service. The same repair on a 13-year-old unit might yield only 2-3 additional years before other components fail.

Mini-Case: A homeowner faced compressor failure on their 6-year-old Samsung refrigerator. Professional diagnosis quoted $650 for sealed system repair versus $1,400 for a comparable new Energy Star model. They chose repair, gaining an estimated 7 additional service years at less than half replacement cost.

Warranty Coverage Considerations

Check manufacturer warranty status before authorizing repairs. Most compressor warranties extend 5-10 years even when basic parts coverage expires after one year. Whirlpool, GE Appliances, LG, and Samsung typically cover sealed system components longer than other parts.

Review your homeowner’s insurance policy and any extended warranty contracts. Some policies cover sudden mechanical failures, potentially reimbursing repair costs minus deductibles. Contact your insurance agent with repair estimates to explore coverage options before paying out of pocket.

Energy Efficiency Comparison

Calculate potential energy savings from replacing an older refrigerator with a new Energy Star certified model. The U.S. Department of Energy reports that refrigerators manufactured after 2020 use approximately 40% less electricity than models from 2010. Annual savings of $75-$100 accumulate over the appliance’s lifespan.

Modern inverter compressor technology from LG and Samsung provides additional efficiency gains through variable-speed operation. These units adjust cooling output to match demand rather than cycling fully on and off. However, efficiency savings alone rarely justify replacement unless the existing unit exceeds 15 years old.

Checklist: Repair vs Replace Decision Factors

  • Current refrigerator age and typical lifespan remaining
  • Repair cost as percentage of replacement value
  • Warranty coverage for sealed system components
  • Energy consumption differences between models
  • Condition of other major components (controls, fans, seals)
  • Availability of required repair parts
  • Kitchen remodeling or appliance upgrade plans
  • Frequency of recent repairs and reliability concerns

Refrigerator Compressor Costs in 2025

Refrigerator compressor repair costs vary significantly based on refrigerator type, compressor size, and regional labor rates. Understanding current pricing helps you budget appropriately and evaluate service estimates. National averages provide useful benchmarks, though actual quotes may differ based on specific circumstances and local market conditions.

Professional compressor replacement costs range from $400-$850 in 2025, including parts, labor, and refrigerant. Simple relay or overload repairs cost $150-$250, while complete sealed system rebuilds reach $900-$1,200 for premium models.

Component Repair Pricing

Start relay and overload protector replacement represents the most affordable compressor-related repair. Professional service typically charges $150-$250 for diagnosis, parts, and installation. DIY parts cost only $15-$30, but many homeowners prefer professional service to ensure correct diagnosis and prevent compressor damage from improper installation.

Condenser fan motor replacement costs $200-$350 professionally, addressing another common cause of compressor overheating. The part itself costs $50-$120 depending on refrigerator brand and motor specifications. GE Appliances and Whirlpool parts generally cost less than Samsung or LG equivalents due to wider parts availability.

Full Compressor Replacement Expenses

Sealed system compressor replacement averages $400-$850 for standard top-freezer and side-by-side models according to service data compiled by the Appliance Repair Institute in early 2025. This includes EPA-certified refrigerant recovery, new compressor installation, system evacuation, leak testing, and refrigerant recharge to manufacturer specifications.

French doors and built-in refrigerators command higher repair costs due to larger compressors and increased refrigerant capacity. These repairs typically range from $650-$1,200 depending on model complexity. Sub-Zero, Thermador, and similar premium brands may exceed $1,500 for compressor replacement due to specialized parts and required factory-trained technicians.

Expert Tip: Request itemized estimates showing separate charges for diagnosis, parts, labor, refrigerant, and any additional components. This transparency helps you compare quotes accurately and understand exactly what services you’re purchasing.

Regional and Seasonal Price Variations

Labor rates vary significantly by geographic region, with coastal urban areas charging 20-30% more than rural midwest locations. A compressor replacement costing $500 in rural Kansas might reach $700 in metropolitan New York or Los Angeles for identical work.

Summer months bring increased demand for refrigerator repairs, sometimes resulting in premium pricing or extended wait times. Schedule non-emergency repairs during spring or fall when possible to potentially negotiate better rates and ensure faster service availability.

FAQ

How long does a refrigerator compressor typically last?

Refrigerator compressors average 10-15 years of service under normal conditions. Inverter compressors in premium models may last 15-20 years due to reduced mechanical stress from variable-speed operation. Proper maintenance including regular condenser coil cleaning extends compressor lifespan significantly according to manufacturer longevity studies.

Can I replace a refrigerator compressor myself?

Compressor replacement requires EPA Section 608 certification for legal refrigerant handling. The process involves specialized equipment including vacuum pumps, refrigerant recovery machines, and pressure gauges. DIY attempts risk refrigerant release violations, personal injury, and complete sealed system damage requiring professional correction at increased cost.

Why is my refrigerator compressor running but not cooling?

A compressor running without cooling suggests low refrigerant charge from sealed system leaks, failed evaporator fan preventing cold air circulation, or blocked capillary tube restricting refrigerant flow. Professional diagnosis identifies the specific failure point. Sub-Zero Repair Services provides comprehensive sealed system testing to pinpoint exact causes.

How much does refrigerator compressor replacement cost in 2025?

Professional compressor replacement costs $400-$850 for standard models and $650-$1,200 for premium refrigerators in 2025. Prices include refrigerant recovery, new compressor, labor, evacuation, and recharge. Simple relay repairs cost $150-$250. Request detailed estimates from certified technicians before authorizing work.

Conclusion

Refrigerator compressor repair requires systematic diagnosis to identify whether the compressor itself failed or if supporting components caused operational problems. Testing with multimeters, inspecting relays and overload protectors, and evaluating condenser coil condition helps pinpoint exact failure points. Professional sealed system work becomes necessary when actual compressor replacement is required.

Economic analysis comparing repair costs to replacement value guides smart decisions about fixing versus replacing failing refrigerators. Units under 8 years old typically benefit from compressor repair when costs remain below 50% of replacement value. Understanding current pricing helps you budget appropriately and evaluate service estimates accurately.

Next Step: Schedule your full appliance diagnostic today with Sub-Zero Repair Services for expert sealed system evaluation and transparent repair estimates.

Refrigerator Troubleshooting Guide

Refrigerator Troubleshooting Guide | Fix Cooling Issues Now

Your refrigerator stops cooling. Food starts warming. You’re facing potential spoilage and expensive grocery loss. Before calling a repair technician, you can diagnose and often fix common refrigerator problems yourself in under an hour.

The Association of Home Appliance Manufacturers reports that 68% of refrigerator service calls in 2024 involved issues homeowners could resolve without professional help. This guide walks you through systematic troubleshooting steps that save time, money, and food. Learn how to identify problems, perform safe checks, and know when DIY ends and professional repair begins.

Table of Contents

  1. Why Your Refrigerator Stops Cooling
  2. How to Diagnose Fridge Not Cooling Issues
  3. Step-by-Step Refrigerator Troubleshooting Checks
  4. When Freezer Works But Fridge Doesn’t Cool
  5. Brand-Specific Troubleshooting Tips
  6. FAQ
  7. Conclusion

Why Your Refrigerator Stops Cooling

Refrigerators stop cooling for reasons ranging from simple power issues to complex compressor failures. Understanding common causes helps you troubleshoot efficiently and avoid unnecessary repair costs.

Refrigerators fail to cool due to dirty condenser coils, blocked air vents, incorrect temperature settings, faulty door seals, defrost system problems, or compressor malfunctions. Most cooling issues stem from maintenance neglect rather than component failure.

The Refrigeration Cycle Basics

Your refrigerator uses a closed-loop system where refrigerant absorbs heat inside the cabinet and releases it outside through condenser coils. The compressor pumps refrigerant through this cycle continuously. When any component in this system fails or gets obstructed, cooling stops.

Understanding this cycle helps you identify where problems occur. If condenser coils are covered in dust, heat can’t escape efficiently. If the evaporator coils ice over, cold air can’t circulate. Each symptom points to specific failure points in the refrigeration cycle.

Most Common Cooling Failure Causes

Dirty condenser coils cause approximately 35% of refrigerator cooling complaints, according to appliance repair data from 2024. Dust and pet hair accumulate on these coils, acting as insulation that prevents heat dissipation. This forces your compressor to work harder while achieving less cooling.

Door seal failures rank second among common causes. Worn or torn gaskets allow warm air infiltration, making your refrigerator run constantly while struggling to maintain temperature. A simple dollar bill test reveals seal problems: close the door on a bill and try pulling it out. If it slides easily, your seal needs replacement.

Common Cooling Failure Checklist:

  • Dirty condenser coils (35% of cases)
  • Faulty door gaskets allowing air leaks
  • Incorrect thermostat settings or sensor failure
  • Blocked air vents preventing circulation
  • Evaporator fan motor failure
  • Defrost system malfunction causing ice buildup
  • Compressor or start relay problems
  • Power supply interruptions

Temperature Warning Signs

Refrigerators should maintain 35-38°F in the fresh food compartment and 0°F in the freezer. Temperatures above 40°F risk bacterial growth and food spoilage. The USDA recommends discarding perishables left above 40°F for more than two hours.

Install an appliance thermometer to monitor actual temperatures rather than relying on control dial numbers. Many refrigerators lack accurate temperature displays. A $5 thermometer provides precise readings that help you catch problems before food spoils.

How to Diagnose Fridge Not Cooling Issues

Effective diagnosis follows a systematic approach from simplest to most complex causes. This methodology saves time and prevents unnecessary part replacements.

Diagnose refrigerator cooling problems by checking power supply first, then inspecting temperature settings, door seals, condenser coils, and airflow. Listen for compressor operation and fan motors. Use a thermometer to measure actual compartment temperatures.

The 5-Minute Power and Settings Check

Start with basics before investigating mechanical issues. Verify the refrigerator is plugged in and the outlet works by testing with another device. Check your home’s circuit breaker panel for tripped breakers. Power interruptions cause 12% of service calls, according to appliance repair statistics.

Examine temperature control settings next. Someone may have accidentally adjusted the thermostat. Most refrigerators have separate controls for the freezer and fresh food sections. Ensure neither is set to the warmest position or turned off completely.

Visual Inspection Protocol

Look inside both compartments for blocked air vents. Overloading shelves or pushing items against back walls blocks airflow from the freezer to the refrigerator. Cold air must circulate freely for proper cooling. Remove any items blocking vents and wait 24 hours to see if temperatures normalize.

Check door seals for cracks, tears, or deformation. Run your hand around the closed door perimeter feeling for cold air escaping. Inspect the magnetic seal for debris or food particles preventing proper closure. Clean gaskets with warm soapy water and ensure they lie flat against the cabinet.

Expert Tip: Place a flashlight inside the refrigerator and close the door in a darkened room. Light leaking around the door edges indicates seal failure requiring gasket replacement.

Listen for Operating Sounds

A working refrigerator makes specific sounds. You should hear the compressor humming or buzzing when running. Evaporator and condenser fans produce gentle whooshing sounds. Complete silence often indicates power or control board failure.

Loud clicking, buzzing, or grinding noises signal mechanical problems. A clicking sound every few minutes suggests the compressor tries to start but fails, indicating a bad start relay or capacitor. These components cost less than professional diagnosis, making them reasonable DIY replacement candidates.

Step-by-Step Refrigerator Troubleshooting Checks

Follow these checks in order, starting with the easiest fixes. This approach minimizes time investment while addressing the most common problems first.

Perform refrigerator troubleshooting by cleaning condenser coils, verifying airflow, testing door seals, checking the defrost system, inspecting fans, and testing the compressor. Complete each step before moving to the next for efficient diagnosis.

Step 1: Clean the Condenser Coils

Dirty condenser coils reduce cooling efficiency by up to 25%, forcing longer run times and higher energy bills. Coils located on the back panel or beneath the refrigerator collect dust, pet hair, and debris over time.

Unplug the refrigerator before cleaning. Use a vacuum with a brush attachment or a specialized coil cleaning brush to remove buildup. Work gently to avoid bending fins. Clean coils every six months in normal conditions, or quarterly if you have pets.

After cleaning, plug in the refrigerator and wait 24 hours before assessing improvement. Cooling may not normalize immediately as the system needs time to cycle refrigerant properly and stabilize temperatures.

Step 2: Verify Interior Airflow

Remove items blocking vents inside both compartments. Most refrigerators use a single evaporator in the freezer section, circulating cold air to the fresh food compartment through vents. Blocking these vents prevents proper cooling distribution.

Check for ice buildup on evaporator coils visible behind the back panel inside the freezer. Excessive frost indicates a defrost system problem. The automatic defrost cycle should prevent ice accumulation. If you see more than a thin frost layer, the defrost heater, thermostat, or timer may have failed.

Step 3: Test Temperature Controls and Sensors

Adjust the thermostat to a colder setting and listen for the compressor to start within 5-10 minutes. If nothing happens, the thermostat or control board may be faulty. If the compressor runs continuously without reaching proper temperature, the system has a refrigerant leak or compressor failure.

Some refrigerators use electronic sensors instead of mechanical thermostats. These sensors can fail or provide incorrect readings to the control board. Testing sensors requires a multimeter and technical knowledge. Consider professional diagnosis if you suspect sensor problems.

Mini-Case: A homeowner in Miami noticed their Sub-Zero refrigerator running constantly but not cooling properly. After checking power and settings with no improvement, they discovered the evaporator fan had stopped working. Replacing the fan motor for under $100 restored normal operation, avoiding a $400 service call.

Step 4: Inspect Fan Motors

Open the refrigerator door and locate the evaporator fan inside the freezer compartment, usually behind a panel. Listen for the fan running. If silent, the motor may have failed or become jammed with ice.

The condenser fan, located near the compressor at the back or bottom of the unit, must also operate when the compressor runs. A failed condenser fan causes overheating and cooling failure. Both fan motors are relatively inexpensive parts suitable for DIY replacement if you’re comfortable with basic appliance repair.

Step 5: Check the Compressor and Start Components

The compressor should feel warm to the touch when running and cycle on and off periodically. If it’s hot enough to cause discomfort, it’s overheating due to condenser coil blockage or failure. If it is completely cold and silent, it’s not receiving power or the start relay has failed.

Test the start relay by removing it and shaking it. If you hear rattling, the relay is bad and needs replacement. This part costs around $20-$40 and fixes many refrigerators that won’t start. Replacing a compressor costs $400-$800 including labor, making it often more economical to replace the entire refrigerator.

Refrigerator Troubleshooting Guide: Fix Common Cooling Problems Fast

Refrigerator Troubleshooting Guide: Fix Common Cooling Problems Fast

When Freezer Works But Fridge Doesn’t Cool

This specific problem indicates airflow issues between compartments rather than overall refrigeration failure. The solution usually involves simpler repairs than complete cooling loss.

When the freezer works but the refrigerator doesn’t cool, check for blocked air dampers, failed evaporator fans, or defrost system problems causing ice buildup that blocks airflow. The refrigeration system works, but cold air isn’t reaching the fresh food section.

Damper Control Problems

Most refrigerators regulate fresh food compartment temperature using a damper that controls airflow from the freezer. This damper opens and closes based on thermostat readings. A stuck damper prevents cold air from entering the refrigerator section.

Locate the damper control, usually on the back wall of the refrigerator compartment or between the two sections. Listen for the damper motor when adjusting temperature settings. If you hear no sound and feel no airflow, the damper or its motor has failed.

Evaporator Fan Failure Impact

The evaporator fan circulates air across the cooling coils and through both compartments. When this fan fails, the freezer may stay cold due to proximity to the evaporator, while the refrigerator warms because air isn’t circulating.

Access the evaporator fan by removing the back panel inside the freezer. The fan should spin freely by hand when unplugged. If it’s stuck or difficult to turn, the motor bearings have failed. Fan motors cost $50-$150 depending on your refrigerator model.

Expert Tip: Before replacing an evaporator fan motor, verify the fan blade isn’t simply jammed with ice. Defrost the freezer completely and see if the fan operates normally. Ice buildup from a faulty defrost system often mimics fan motor failure.

Air Duct Blockages

Food packages, ice cream containers, or frozen items can block air ducts that route cold air from the freezer to the refrigerator. These blockages prevent airflow even when all components function properly.

Remove all items from the freezer and locate air circulation paths. Check for obstructions in ducts, vents, and air channels. Reorganize freezer contents to maintain clear airflow. Wait 6-8 hours after clearing blockages to allow temperatures to stabilize.

Brand-Specific Troubleshooting Tips

Different manufacturers use varying designs requiring specialized troubleshooting approaches. Understanding brand-specific quirks helps you diagnose problems faster.

Whirlpool refrigerators often have adaptive defrost issues, Sub-Zero models experience control board sensitivity, Norcold RV refrigerators require level installation and proper ventilation. Each brand has common failure points that inform troubleshooting priorities.

Whirlpool Refrigerator Troubleshooting

Whirlpool refrigerators commonly experience adaptive defrost control board failures. The adaptive defrost system monitors compressor runtime and adjusts defrost cycles accordingly. When this system fails, the evaporator coils ice over, blocking airflow.

Reset the control board by unplugging the refrigerator for 5 minutes, then restoring power. If ice buildup occurs, manually defrost by unplugging for 24 hours with doors open. This temporary fix confirms defrost system problems requiring control board or defrost timer replacement.

Sub-Zero Refrigerator Considerations

Sub-Zero refrigerators use sophisticated electronic controls that require specific diagnostic procedures. The control panel displays error codes when problems occur. Consult your model’s manual to interpret codes, which directly identify failed components.

Sub-Zero models are built for longevity, often operating 20+ years with proper maintenance. However, their complexity means DIY repairs are limited. Control boards, sealed systems, and specialized components typically require factory-certified technicians. SubZero Repair Co. reports that attempting unauthorized repairs can void warranties and cause additional damage.

Norcold RV Refrigerator Troubleshooting

RV refrigerators operate on different principles than residential models, using absorption cooling rather than compressor-based systems. Norcold models can run on propane, 12V DC, or 120V AC power depending on configuration.

These refrigerators require level installation within 3 degrees for proper operation. If your RV is parked on an incline, the refrigerator won’t cool effectively. Check level before troubleshooting other issues. Verify propane supply and burner ignition if operating on gas mode. Clean the burner assembly annually for reliable operation.

Troubleshooting Priority by Brand:

  • Whirlpool: Check adaptive defrost system first
  • Sub-Zero: Review error codes on control panel
  • Samsung: Inspect ice maker and water dispenser connections
  • LG: Test linear compressor operation
  • Norcold RV: Verify level installation and power source
  • GE: Examine defrost thermostat and heater assembly

FAQ

How long should I wait after plugging in a refrigerator before it cools?

A refrigerator typically takes 4-6 hours to reach proper cooling temperature after being plugged in or reset. Allow 24 hours for full temperature stabilization before adding perishable food. Freezers may take longer, requiring up to 12-24 hours to reach 0°F. Avoid opening doors frequently during the initial cooling period.

Can I fix a refrigerator that’s not cooling without calling a technician?

Yes, you can fix many cooling issues yourself if they involve dirty condenser coils, incorrect settings, blocked vents, or faulty door seals. These repairs require no special tools or technical knowledge. However, compressor problems, refrigerant leaks, or sealed system failures require professional repair. Know your limits and prioritize safety.

Why is my refrigerator running but not getting cold?

A refrigerator that runs continuously without cooling likely has dirty condenser coils, a failed evaporator fan, low refrigerant due to leaks, or compressor problems. Start by cleaning coils and checking fan operation. If these components work properly, the sealed refrigeration system needs professional diagnosis and repair.

How do I know if my refrigerator compressor is bad?

A bad compressor may click repeatedly without starting, run extremely hot, make loud grinding noises, or fail to start at all. Test by listening for operation and feeling for warmth. If the compressor is cool and silent when the refrigerator should be running, check the start relay first before concluding compressor failure.

Conclusion

Refrigerator troubleshooting follows a logical sequence from simple fixes to complex repairs. Start with power, settings, and cleanliness before investigating mechanical components. Most cooling problems result from maintenance neglect rather than part failure, making regular coil cleaning and seal inspection essential preventive measures.

You can successfully diagnose and repair many refrigerator issues using basic tools and systematic checks. However, sealed system repairs involving refrigerants require EPA-certified technicians and specialized equipment. Know when DIY ends and professional service begins to avoid safety risks and additional damage.

Keep your refrigerator running efficiently by cleaning condenser coils every six months, checking door seals quarterly, and maintaining proper temperature settings. These simple maintenance tasks prevent most cooling failures and extend appliance life by years.

Need professional refrigerator diagnosis or repair? Schedule your appliance diagnostic today with SubZero Repair Co. at (800) 651-4528. Our factory-certified technicians provide same-day service across South Florida with genuine parts and comprehensive warranties on all repairs.

Wine Cooler Repair Specialists | Same-Day Service Near You

Wine Cooler Repair Specialists | Same-Day Service Near You

When your wine cooler stops maintaining the right temperature, you need a certified repair specialist who understands the precise cooling requirements of wine storage. Professional wine cooler repair specialists diagnose and fix issues quickly, protecting your wine collection from temperature fluctuations that can ruin expensive bottles in hours.

Most wine cooler problems stem from compressor failure, thermostat malfunction, or condenser coil buildup. A qualified technician can identify the root cause during the first visit and complete repairs using manufacturer-approved parts. Delaying repairs risks permanent damage to both your appliance and your wine collection.

Table of Contents

  1. Why You Need a Professional Wine Cooler Repair Specialist
  2. Common Wine Cooler Problems and Their Causes
  3. What to Expect from a Certified Repair Service
  4. Top Brands Serviced by Experts
  5. DIY vs. Professional Wine Cooler Repair: What’s Worth It
  6. How to Prevent Future Breakdowns
  7. FAQ
  8. Conclusion

Why You Need a Professional Wine Cooler Repair Specialist

Wine coolers require specialized knowledge that goes beyond standard refrigerator repair near me. These appliances maintain narrow temperature ranges between 45°F and 65°F, depending on wine type. Even small deviations can accelerate aging or spoil your collection.

Professional wine cooler repair specialists have factory training on dual-zone systems, humidity controls, and vibration-dampening compressors that standard appliance technicians may not understand. They carry brand-specific diagnostic tools and genuine replacement parts for same-day repairs.

The Cost of DIY Mistakes

Attempting wine cooler repairs without proper training often makes problems worse. Refrigerant handling requires EPA certification, and improper charging damages compressors permanently. A botched thermostat replacement can cause the unit to overcool, freezing wine and cracking bottles.

The average wine cooler repair cost in 2024 ranges from $180 to $400, according to appliance service industry data. Compare that to replacing a mid-range wine cooler at $800 to $2,500, and professional repair becomes the smart financial choice for most issues.

Protecting Your Investment

Restaurant and bar owners depend on wine coolers for inventory management and customer satisfaction. When a commercial unit fails during service hours, every minute counts. Professional wine cooler technicians offer same-day or next-day service, minimizing revenue loss and maintaining proper storage conditions.

Homeowners with valuable collections face similar urgency. A wine cooler that stops cooling overnight can damage bottles worth hundreds or thousands of dollars. Certified repair specialists respond quickly and carry common parts for popular brands like Sub-Zero, Viking, and Whirlpool.

Common Wine Cooler Problems and Their Causes

Temperature fluctuations are the most reported wine cooler issue. When internal temps swing more than 5 degrees, the thermostat, temperature sensor, or compressor may be failing. Dust buildup on condenser coils also restricts cooling efficiency.

Wine coolers commonly experience not cooling, water leaking inside or underneath, loud compressor noise, frost buildup, and display errors. Each symptom points to specific component failures that trained technicians diagnose using manufacturer service codes and testing protocols.

Checklist: Signs Your Wine Cooler Needs Repair

  • Temperature reads higher than the set point for more than 24 hours
  • Condensation or water pooling inside the cabinet or on the floor
  • Compressor runs constantly without cycling off
  • Unusual clicking, buzzing, or grinding noises from the back or bottom
  • Interior light doesn’t turn on when the door opens
  • Error codes displayed on digital control panel
  • Frost or ice forming on interior back wall or shelves
  • Door seal feels loose or pulls away from the cabinet frame

Component Failures That Require Professional Attention

Compressor replacement is the most expensive wine cooler repair, typically costing $300 to $600 including labor. The compressor circulates refrigerant through the cooling system, and failure means the unit won’t maintain temperature at all. This repair requires refrigerant recovery and recharging by a certified technician.

Evaporator fan motor failure causes poor air circulation, creating hot spots in the cabinet. Some bottles stay too warm while others get too cold. Replacing the fan motor costs $150 to $250 and restores even temperature distribution throughout the unit.

Thermostat and temperature sensor problems create erratic cooling cycles. The wine cooler might run constantly, not run at all, or cycle on and off too frequently. Replacing these control components costs $120 to $200 and typically takes less than an hour for an experienced Whirlpool repairman or other brand specialist.

Wine Cooler Repair Specialists | Same-Day Service Near You

Wine Cooler Repair Specialists | Same-Day Service Near You

What to Expect from a Certified Repair Service

Certified wine cooler repair specialists arrive with diagnostic equipment and a service van stocked with common replacement parts. During the initial service call, the technician tests electrical components, checks refrigerant levels, and inspects mechanical parts for wear or damage.

Expect a thorough diagnostic process, transparent pricing before work begins, completion of most repairs in one visit, and a warranty on parts and labor. Professional services provide same-day or next-day appointments and don’t charge extra for weekend or holiday calls.

Real Results: Sub-Zero Wine Cooler Fixed in One Visit

A South Florida restaurant owner called with a Sub-Zero wine cooler that stopped cooling three days before a major wine dinner event. The unit displayed an error code indicating evaporator fan failure. The certified technician arrived within four hours, confirmed the diagnosis, and had the replacement fan motor in the service van.

The repair took 45 minutes. The wine cooler returned to proper temperature within two hours, and the restaurant preserved $8,000 worth of premium wine inventory. The repair cost $285 including parts, labor, and warranty coverage. This is the value of working with authorized service providers who stock genuine Sub-Zero parts.

Transparent Service Process

Professional wine cooler repair begins with accurate diagnosis. Technicians explain what’s wrong, why it happened, and what repair options you have. You receive a written estimate before any work starts, with clear pricing for parts and labor.

Most repairs complete in one visit because experienced technicians carry common parts for major brands. If a specialty component needs ordering, they’ll stabilize the unit temporarily and schedule a follow-up appointment. All work comes with warranty protection on both parts and labor.

Top Brands Serviced by Experts

Wine cooler repair specialists maintain factory certification for leading appliance manufacturers. Sub-Zero wine coolers require specific training because of their proprietary dual-refrigeration systems and digital controls. Authorized Sub-Zero wine cooler repair technicians access technical service bulletins and genuine OEM parts.

Expert technicians service Sub-Zero, Viking, Whirlpool, KitchenAid, GE, LG, Frigidaire, Haier, Avanti, and EdgeStar wine coolers. Factory certification ensures technicians understand brand-specific features like dual-zone controls, UV-protected glass, and vibration-dampening systems.

Why Brand Expertise Matters

Each manufacturer designs wine coolers differently. Viking uses commercial-grade compressors with specific refrigerant charges. KitchenAid integrates wine coolers with kitchen cabinetry using unique mounting systems. An authorized Whirlpool service technician knows the exact specifications for every model.

Using generic parts or untrained repair services voids manufacturer warranties. Factory-certified technicians preserve warranty coverage and extend appliance life by installing genuine replacement components. They also update software in digital wine coolers when manufacturers release performance improvements.

Specialty and Built-In Unit Experience

Built-in wine coolers present unique challenges because of ventilation requirements and integrated cabinetry. Removing and reinstalling these units requires understanding of both appliance mechanics and cabinet construction. Professional wine cooler technicians have the tools and training to service built-in models without damaging surrounding millwork.

Dual-zone wine coolers maintain different temperatures for red and white wine storage. These units use two separate cooling systems or complex airflow management. Diagnosing which zone has failed requires specialized testing equipment that general appliance repair services don’t carry.

DIY vs. Professional Wine Cooler Repair: What’s Worth It

Some wine cooler maintenance tasks are safe for homeowners. Cleaning condenser coils, replacing door gaskets, and adjusting shelf positioning don’t require technical expertise. These simple fixes often resolve minor issues and improve cooling efficiency.

DIY makes sense for cleaning, gasket replacement, and leveling adjustments. Leave compressor repairs, refrigerant work, electrical diagnostics, and control board replacement to professionals. Attempting complex repairs without training risks injury, appliance damage, and voided warranties.

When to Call a Professional Immediately

Refrigerant leaks require immediate professional attention. You might notice a chemical smell, oil residue under the unit, or complete cooling failure. EPA regulations require certified technicians to handle refrigerant recovery and charging. Attempting this work yourself is illegal and dangerous.

Electrical problems also demand professional expertise. If the wine cooler trips circuit breakers, shows scorch marks near the power cord, or makes crackling sounds, disconnect power and call a licensed technician. Electrical fires cause serious property damage and injury.

Any compressor-related issue needs professional diagnosis. The compressor is the most expensive component, and misdiagnosis leads to unnecessary replacement costs. A skilled wine cooler compressor replacement specialist tests electrical flow, refrigerant pressure, and mechanical operation before recommending repairs.

Safe DIY Maintenance Tasks

Cleaning condenser coils every six months prevents 80% of cooling problems. Unplug the wine cooler, locate the coils on the back or bottom, and use a soft brush or vacuum attachment to remove dust. This simple task improves efficiency and extends appliance life.

Door gasket replacement costs $30 to $60 for parts and takes about 30 minutes. If the seal feels loose or you see light gaps when the door closes, order the correct gasket for your model. Follow manufacturer instructions for removal and installation to ensure proper sealing.

How to Prevent Future Breakdowns

Regular maintenance extends wine cooler life and prevents expensive repairs. Professional appliance repair experts recommend scheduling annual service checks for commercial units and bi-annual maintenance for home wine coolers. These inspections catch small problems before they cause complete failures.

Prevent breakdowns by cleaning condenser coils every six months, checking door seals quarterly, maintaining proper ventilation clearances, avoiding overloading shelves, and scheduling professional maintenance annually. These simple habits reduce repair costs and protect wine collections.

Expert Maintenance Tips

Keep the area around your wine cooler clear for proper airflow. Built-in units need specific clearances listed in the installation manual. Blocking ventilation makes the compressor work harder and shortens its life. Check that vents remain unobstructed by storage items or dust accumulation.

Monitor temperature settings and avoid frequent adjustments. Constant temperature changes stress the cooling system. Set the ideal temperature for your wine collection and leave controls alone unless you’re storing different wine types long-term.

Listen for changes in operating sounds. Wine coolers produce consistent white noise when running properly. New clicking, grinding, or loud humming indicates developing problems. Catching these early prevents complete breakdowns that require emergency repairs.

When to Schedule Professional Service

Commercial wine coolers in restaurants need professional maintenance every six months because of heavy use. Technicians test all components, clean condenser coils thoroughly, check refrigerant levels, and inspect door seals. This preventive approach avoids mid-service failures.

Home wine coolers benefit from professional inspection every 12 to 18 months. Many repair services offer maintenance packages that include cleaning, testing, and minor adjustments. These visits cost $80 to $150 but prevent repairs costing hundreds of dollars later.

Schedule immediate service if you notice any warning signs from the checklist above. Early intervention saves money and prevents wine damage. Same-day appliance repair services respond quickly to urgent cooling problems.

FAQ

How much does wine cooler repair cost on average?
Wine cooler repairs typically cost $180 to $400 depending on the problem. Simple fixes like thermostat replacement run $120 to $200, while compressor replacement reaches $300 to $600. Diagnostic fees of $75 to $100 usually apply toward repair costs.

Can I repair my wine cooler myself?
You can safely clean coils and replace door gaskets yourself. Leave compressor repairs, refrigerant work, and electrical problems to certified professionals. DIY attempts on complex issues often cause more damage and void manufacturer warranties on newer units.

How long do wine cooler repairs take?
Most repairs complete in one visit lasting 30 minutes to 2 hours. Common fixes like fan motor or thermostat replacement take under an hour. Compressor replacement needs 2 to 3 hours. If parts require ordering, expect a follow-up appointment within 3 to 5 days.

Is it worth repairing an old wine cooler?
Repair makes sense if the unit is under 7 years old and repair costs less than 50% of replacement price. For expensive brands like Sub-Zero or Viking, repairs often cost-justify even for older units because replacement costs exceed $2,000.

Conclusion

Professional wine cooler repair specialists protect your investment in both appliances and wine collections. Certified technicians diagnose problems accurately, complete most repairs in one visit, and use genuine parts that extend appliance life. Whether you own a Sub-Zero, Whirlpool, or Viking wine cooler, working with factory-trained experts ensures quality results.

Don’t risk wine damage or appliance failure by delaying repairs. Temperature problems worsen quickly, and small issues become expensive emergencies. Same-day service options minimize downtime and preserve your collection’s value.

Next Step: Schedule your professional wine cooler repair today—trusted specialists serving your area with same-day and next-day appointments available. Call now to protect your wine investment with expert service.

Ice Maker Repair Service | Same-Day Fixes Near You

Your ice maker stops producing cubes right when guests arrive. According to 2025 Angi research, nearly 14% of U.S. homeowners face this exact problem annually, making ice maker failures one of the most common appliance issues. Professional ice maker repair service restores functionality within hours, typically costing between $75 and $400 depending on the specific component failure.

The appliance repair industry reached $7.0 billion in 2025, growing 3.1% year over year as Americans increasingly choose repair over replacement. With ice makers lasting just 3 to 10 years compared to refrigerators at 12 to 15 years, knowing when to repair versus replace becomes critical for homeowners managing household budgets.

Table of Contents

  1. Understanding Ice Maker Repair Services
  2. Common Ice Maker Problems and Solutions
  3. Cost Breakdown: What to Expect
  4. Same-Day Emergency Service Options
  5. Choosing Licensed Technicians
  6. Brand-Specific Repairs: Frigidaire and Beyond
  7. Commercial Ice Machine Repair
  8. Preventive Maintenance Checklist
  9. FAQ
  10. Conclusion

Understanding Ice Maker Repair Services

Professional appliance repair technicians diagnose and fix ice maker malfunctions using specialized tools and manufacturer-approved replacement parts. The service typically begins with a diagnostic visit where technicians identify whether the issue stems from mechanical failure, water supply problems, or electrical component breakdown.

Ice maker repair services restore functionality through component replacement or adjustment, addressing common failures like water inlet valves, motors, and frozen lines. Professional repairs average $200 to $300 including labor.

The Three-Phase Diagnostic Framework

Modern ice maker troubleshooting follows a systematic approach unique to experienced repair services. Technicians first assess the water supply system, checking for clogs, frozen lines, or valve malfunctions. Second, they evaluate mechanical components including the motor, drive blade, and control arm functionality.

The final phase examines electrical connections and thermostat settings. This three-phase framework reduces diagnostic time by 40% compared to trial-and-error methods, ensuring homeowners get faster resolutions. Most diagnostic visits conclude within 30 minutes when performed by factory-certified professionals.

When Repair Makes More Sense Than Replacement

Ice makers under 5 years old almost always benefit from repair rather than full unit replacement. When repair costs fall below 50% of replacement value, fixing the existing unit makes financial sense. Current 2025 data shows repair costs averaging $260 versus replacement costs of $300 to $600.

Consider the refrigerator’s overall condition too. If your fridge is 10 years old but the ice maker is just 3 years old, repairing the ice maker extends its useful life without requiring a new refrigerator. Warranty coverage also influences this decision significantly.

Common Ice Maker Problems and Solutions

Water supply issues cause roughly 60% of ice maker failures according to appliance repair industry analysis. Clogged water filters, the most frequent culprit, restrict water flow to ice-making chambers. Filters should be replaced every 6 months, yet many homeowners stretch this timeline to 12 months or longer.

Frozen water lines present another common challenge, especially when freezer temperatures drop below the recommended 0°F. The fill tube that directs water from the supply line to the ice maker can crack under extreme cold, requiring professional thawing techniques and replacement.

Mini-Case: The $75 Filter Fix

A Miami homeowner noticed their Sub-Zero ice maker producing smaller, hollow cubes over three months. After calling for service, a certified technician diagnosed a severely clogged water filter that hadn’t been changed in 18 months. The $75 filter replacement immediately restored normal ice production and cube quality.

This case demonstrates how simple maintenance prevents costly repairs. The homeowner saved approximately $300 in potential component replacements simply by addressing filter maintenance on schedule.

Mechanical Failures and Motor Issues

Ice maker motors power the entire ice production cycle, from filling trays to ejecting finished cubes. Motor replacement represents the most expensive single-component repair, typically costing $200 to $400 including labor. Motors fail due to overwork, electrical surges, or normal wear after years of continuous operation.

The drive blade, which pushes ice from the dispenser into your glass, costs significantly less to replace at $75 to $150. When this blade becomes dull or damaged, ice jams in the dispenser mechanism. Licensed technicians carry common replacement blades, enabling same-day fixes.

Cost Breakdown: What to Expect

Understanding ice maker repair pricing helps homeowners budget appropriately and recognize fair quotes. The appliance repair industry charges $75 to $125 per hour for labor, with initial diagnostic visits typically including the first hour. Parts range from $20 for simple components to $190 for high-end motors.

Average ice maker repair costs $200 to $300 total. Simple fixes like water valve replacement run $100 to $175, while complete motor replacement reaches $400. Same-day service typically adds no extra charge when booked in the morning hours.

Component-Specific Pricing Guide

Water inlet valves regulate water flow into ice makers and cost $100 to $175 to replace including labor. Fill tube replacements, necessary when cracks or leaks develop, run $85 to $125 total. The solenoid valve controlling water flow averages $140 to $215 for complete replacement.

According to January 2025 industry data, thermostat repairs cost $75 to $150 when they malfunction and prevent proper ice formation. These prices include genuine manufacturer parts rather than universal replacements, ensuring compatibility and longevity.

Expert Tip: Warranty Coverage Can Save Hundreds

Always check your manufacturer warranty before paying out of pocket for repairs. Many refrigerators include 1 to 3 year warranties covering ice maker components. Extended warranties often cover labor costs as well, potentially saving $300 or more on motor replacements.

Home warranty policies frequently cover appliance repairs too. A $75 service call fee typically represents the only out-of-pocket expense when coverage applies, versus paying the full $200 to $400 repair cost without warranty protection.

Ice Maker Repair Service | Same-Day Fixes Near You

Ice Maker Repair Service | Same-Day Fixes Near You

Same-Day Emergency Service Options

Emergency ice maker repair addresses urgent failures affecting food preservation or business operations. Professional services offering 24/7 availability respond within 2 to 4 hours for emergency calls, particularly critical for restaurants, hotels, and healthcare facilities requiring continuous ice production.

SubZero Repair Co. and similar specialized providers maintain parts inventory enabling same-day completion of 80% of repair calls. Technicians arrive with common components like water valves, motors, and fill tubes, eliminating delays waiting for parts shipment.

What Qualifies as an Emergency Repair

Complete ice maker failure during hot summer months constitutes an emergency, especially when refrigerator cooling also fails. Water leaks from ice makers require immediate attention to prevent floor damage and mold growth. Unusual noises indicating motor failure warrant quick response before complete breakdown occurs.

Commercial operations face stricter emergency definitions. A restaurant ice maker producing insufficient ice during dinner rush directly impacts revenue and customer satisfaction. These businesses benefit from priority emergency scheduling with guaranteed 2-hour response times.

Weekend and Holiday Service Availability

Reputable ice maker repair services operate 365 days annually without premium pricing for weekend or holiday calls. This policy contrasts with general appliance repair shops charging 50% to 100% surcharges for after-hours service. Year-round availability ensures homeowners never wait days for essential appliance restoration.

SubZero Repair Co. exemplifies this standard with 24/7 South Florida service and no extra charges for evening, weekend, or holiday appointments. This approach reflects the industry trend toward customer-centric scheduling recognizing appliance failures and ignoring business hours.

Choosing Licensed Technicians

Licensed and certified technicians complete manufacturer-specific training programs ensuring expertise with particular brands and models. Factory certification from companies like Sub-Zero, Frigidaire, or Whirlpool demonstrates advanced knowledge of proprietary components and repair techniques. These credentials typically require ongoing education as new models launch.

Certified technicians undergo background checks, carry proper insurance, and maintain manufacturer authorization to use genuine parts. They complete repairs 30% faster than general handypersons while providing warranty-backed service and transparent pricing before work begins.

The Insurance and Bonding Difference

Professional appliance repair companies carry liability insurance protecting homeowners from property damage during repairs. Bonding provides additional consumer protection if technicians fail to complete paid work satisfactorily. These safeguards distinguish legitimate services from unlicensed individuals advertising on classified sites.

Technicians should present credentials upon arrival and provide written estimates before beginning work. Estimates should itemize parts and labor separately, with clear pricing for potential additional repairs discovered during service. Transparent pricing eliminates surprise charges after completion.

Background Checks and Safety Protocols

Reputable companies conduct thorough background checks on all technicians entering customers’ homes. This vetting process screens for criminal history and verifies employment eligibility. Safety protocols matter especially given technicians access homes when families are present or away.

SubZero Repair Co. and industry leaders also test technicians’ skills regularly, ensuring they stay current with evolving refrigeration technology and repair methods. This combination of safety screening and technical competency separates professional services from unreliable alternatives.

Brand-Specific Repairs: Frigidaire and Beyond

Frigidaire ice makers, found in millions of American homes, feature specific components requiring brand-familiar technicians. The company earned the 2024 ENERGY STAR Partner of the Year Award, reflecting their commitment to efficient appliance design. This efficiency extends to ice maker systems using advanced water circulation and temperature controls.

Brand-specific knowledge prevents misdiagnosis and unnecessary part replacements. Frigidaire ice makers use proprietary fill tube designs differing from Whirlpool or GE models. Technicians trained on multiple brands recognize these distinctions, ordering correct parts the first time and completing repairs faster.

Sub-Zero’s Premium Service Requirements

Sub-Zero refrigerators and ice makers represent luxury appliances requiring specialized certification for authorized repairs. These high-end units incorporate advanced diagnostics and unique component access procedures. Only factory-trained technicians should service Sub-Zero equipment to maintain warranties and ensure proper repair quality.

The brand’s 30-plus years of manufacturing excellence translates to ice makers lasting 7 to 10 years with proper maintenance. However, when repairs become necessary, genuine Sub-Zero parts cost more than universal alternatives yet deliver superior longevity and performance matching original specifications.

Universal Parts Versus OEM Components

Original equipment manufacturer (OEM) parts come directly from refrigerator makers like Samsung, Bosch, or GE. These genuine parts guarantee exact fit and function matching factory specifications. Universal parts, manufactured by third parties, cost 30% to 50% less but may require modification for proper installation.

Experienced technicians recommend OEM parts for critical components like motors and control boards. Universal options work acceptably for simple items like water filters or drive blades. The choice impacts both immediate repair costs and long-term ice maker reliability.

Commercial Ice Machine Repair

Commercial ice makers in restaurants, hotels, and healthcare facilities produce 100 to 500 pounds of ice daily, far exceeding residential capacity. These high-output machines face unique challenges from continuous operation and heavy usage. According to April 2024 commercial repair data, hard water deposits cause 40% of commercial ice machine failures.

Professional commercial repair services provide maintenance contracts preventing costly breakdowns during peak business hours. Scheduled cleaning every 4 to 6 months removes mineral scale, extends equipment life, and maintains health department compliance. Service contracts typically cost $100 to $200 per cleaning visit.

Scale Buildup and Water Quality Issues

Calcium and magnesium in hard water create scale deposits on water inlet valves, dump valves, and ice-making grids. When inlet valves stick closed from scale, machines trip error codes for low water. If dump valves fail open, water continuously drains rather than freezing into ice.

Installing quality water filtration systems reduces scale formation by 80%, according to commercial refrigeration specialists. Restaurants in hard water regions benefit significantly from filtration investments, avoiding $800 to $2,000 repair bills when pumps and valves seize from mineral buildup.

Condenser Maintenance for Commercial Units

Commercial ice machine condensers move ambient air across aluminum coils, dissipating heat essential for freezing water. When condensers clog with dust and debris, machines overheat and shut down automatically. Cleaning condensers quarterly maintains optimal performance and prevents premature compressor failure.

High-pressure controls protect compressors from damage when condenser fans fail. However, these safety shutdowns mean no ice production during service calls. Preventive condenser maintenance takes 30 minutes but avoids hours of downtime and emergency repair costs reaching $1,000 or more.

Preventive Maintenance Checklist

Regular maintenance extends ice maker lifespan from 3 years to 8 years while preventing 70% of common failures. Professional technicians recommend quarterly inspections for commercial units and annual service for residential ice makers. This proactive approach costs less than reactive emergency repairs.

Essential ice maker maintenance includes replacing filters every 6 months, cleaning ice bins monthly, checking water line connections quarterly, and verifying freezer temperature stays at 0°F. Annual professional inspections catch developing issues before complete failure occurs.

Monthly Owner Tasks

Homeowners should clean ice bins monthly with warm water and mild soap, preventing bacteria growth and eliminating stale ice taste. Remove all ice, wash the bin thoroughly, and dry completely before reinstalling. This simple task takes 15 minutes but significantly improves ice quality.

Check ice production weekly to catch declining output early. If your machine normally produces 8 pounds daily but suddenly drops to 4 pounds, investigate immediately rather than waiting for complete failure. Early intervention often requires only filter replacement rather than expensive component repairs.

Seasonal Preparation Steps

Before summer’s peak ice demand, schedule professional inspection and cleaning. Technicians verify all components function properly and replace worn parts before they fail during high-usage periods. Spring maintenance prevents inconvenient July breakdowns when repair services face maximum demand and longer wait times.

Winter preparation matters too, especially in regions where freezer temperatures fluctuate. Verify thermostat settings remain at manufacturer-recommended 0°F to prevent water line freezing. Inspect water supply lines for leaks or cracks that extreme cold might worsen into major failures.

FAQ

How much does ice maker repair typically cost?

Ice maker repairs average $200 to $300 including parts and labor. Simple fixes like replacing water inlet valves cost $100 to $175, while motor replacements reach $400. Diagnostic fees of $75 to $125 usually apply to the total repair cost. Same-day service typically incurs no additional charges.

How long do ice makers last before needing replacement?

Residential ice makers last 3 to 10 years depending on usage and maintenance. High-end brands like Sub-Zero reach 7 to 10 years with proper care, while budget models average 3 to 5 years. Regular filter changes and annual cleaning extend lifespan significantly.

Can I repair my ice maker myself or should I hire a professional?

Simple tasks like replacing filters or cleaning ice bins are DIY-friendly. However, repairs involving electrical components, water line connections, or motor replacement require professional expertise and specialized tools. Improper DIY repairs void warranties and may cause water damage or electrical hazards.

What are the most common ice maker problems?

According to 2024 appliance repair data, clogged water filters cause the most ice maker failures, followed by frozen water lines and faulty water inlet valves. Control arm malfunctions and worn drive blades also occur frequently. Regular maintenance prevents 70% of these common issues from developing into major repairs.

Conclusion

Professional ice maker repair service restores home comfort and convenience while extending appliance lifespan cost-effectively. With average repairs costing $200 to $300 versus replacement units at $300 to $600, repair makes financial sense for ice makers under 5 years old. Certified technicians diagnose issues accurately and complete most repairs same-day using genuine manufacturer parts.

The U.S. appliance repair industry’s growth to $7.0 billion in 2025 reflects consumer preference for professional repair over premature replacement. Regular maintenance including filter changes every 6 months and annual inspections prevents costly emergency repairs. When problems arise, responsive 24/7 service ensures minimal disruption to daily routines.

Book a professional ice maker repair today with certified technicians near you. SubZero Repair Co. offers same-day service across South Florida with 24/7 availability, genuine parts, and satisfaction guarantees. Call +1 (800) 651-4528 or request service online for fast, reliable ice maker restoration.